Quickstart for dbt Core from a manual install
Introduction
When you use dbt Core to work with dbt, you will be editing files locally using a code editor, and running projects using a command line interface (CLI).
If you want to edit files and run projects using the web-based dbt Integrated Development Environment (IDE), refer to the dbt Cloud quickstarts. You can also develop and run dbt commands using the dbt Cloud CLI — a dbt Cloud powered command line.
Prerequisites
- To use dbt Core, it's important that you know some basics of the Terminal. In particular, you should understand
cd,lsandpwdto navigate through the directory structure of your computer easily. - Install dbt Core using the installation instructions for your operating system.
- Complete appropriate Setting up and Loading data steps in the Quickstart for dbt Cloud series. For example, for BigQuery, complete Setting up (in BigQuery) and Loading data (BigQuery).
- Create a GitHub account if you don't already have one.
Create a starter project
After setting up BigQuery to work with dbt, you are ready to create a starter project with example models, before building your own models.
Create a repository
The following steps use GitHub as the Git provider for this guide, but you can use any Git provider. You should have already created a GitHub account.
- Create a new GitHub repository named
dbt-tutorial. - Select Public so the repository can be shared with others. You can always make it private later.
- Leave the default values for all other settings.
- Click Create repository.
- Save the commands from "…or create a new repository on the command line" to use later in Commit your changes.
Create a project
Learn how to use a series of commands using the command line of the Terminal to create your project. dbt Core includes an init command that helps scaffold a dbt project.
To create your dbt project:
- Make sure you have dbt Core installed and check the version using the
dbt --versioncommand:
dbt --version
- Initiate the
jaffle_shopproject using theinitcommand:
dbt init jaffle_shop
- Navigate into your project's directory:
cd jaffle_shop
- Use
pwdto confirm that you are in the right spot:
$ pwd
> Users/BBaggins/dbt-tutorial/jaffle_shop
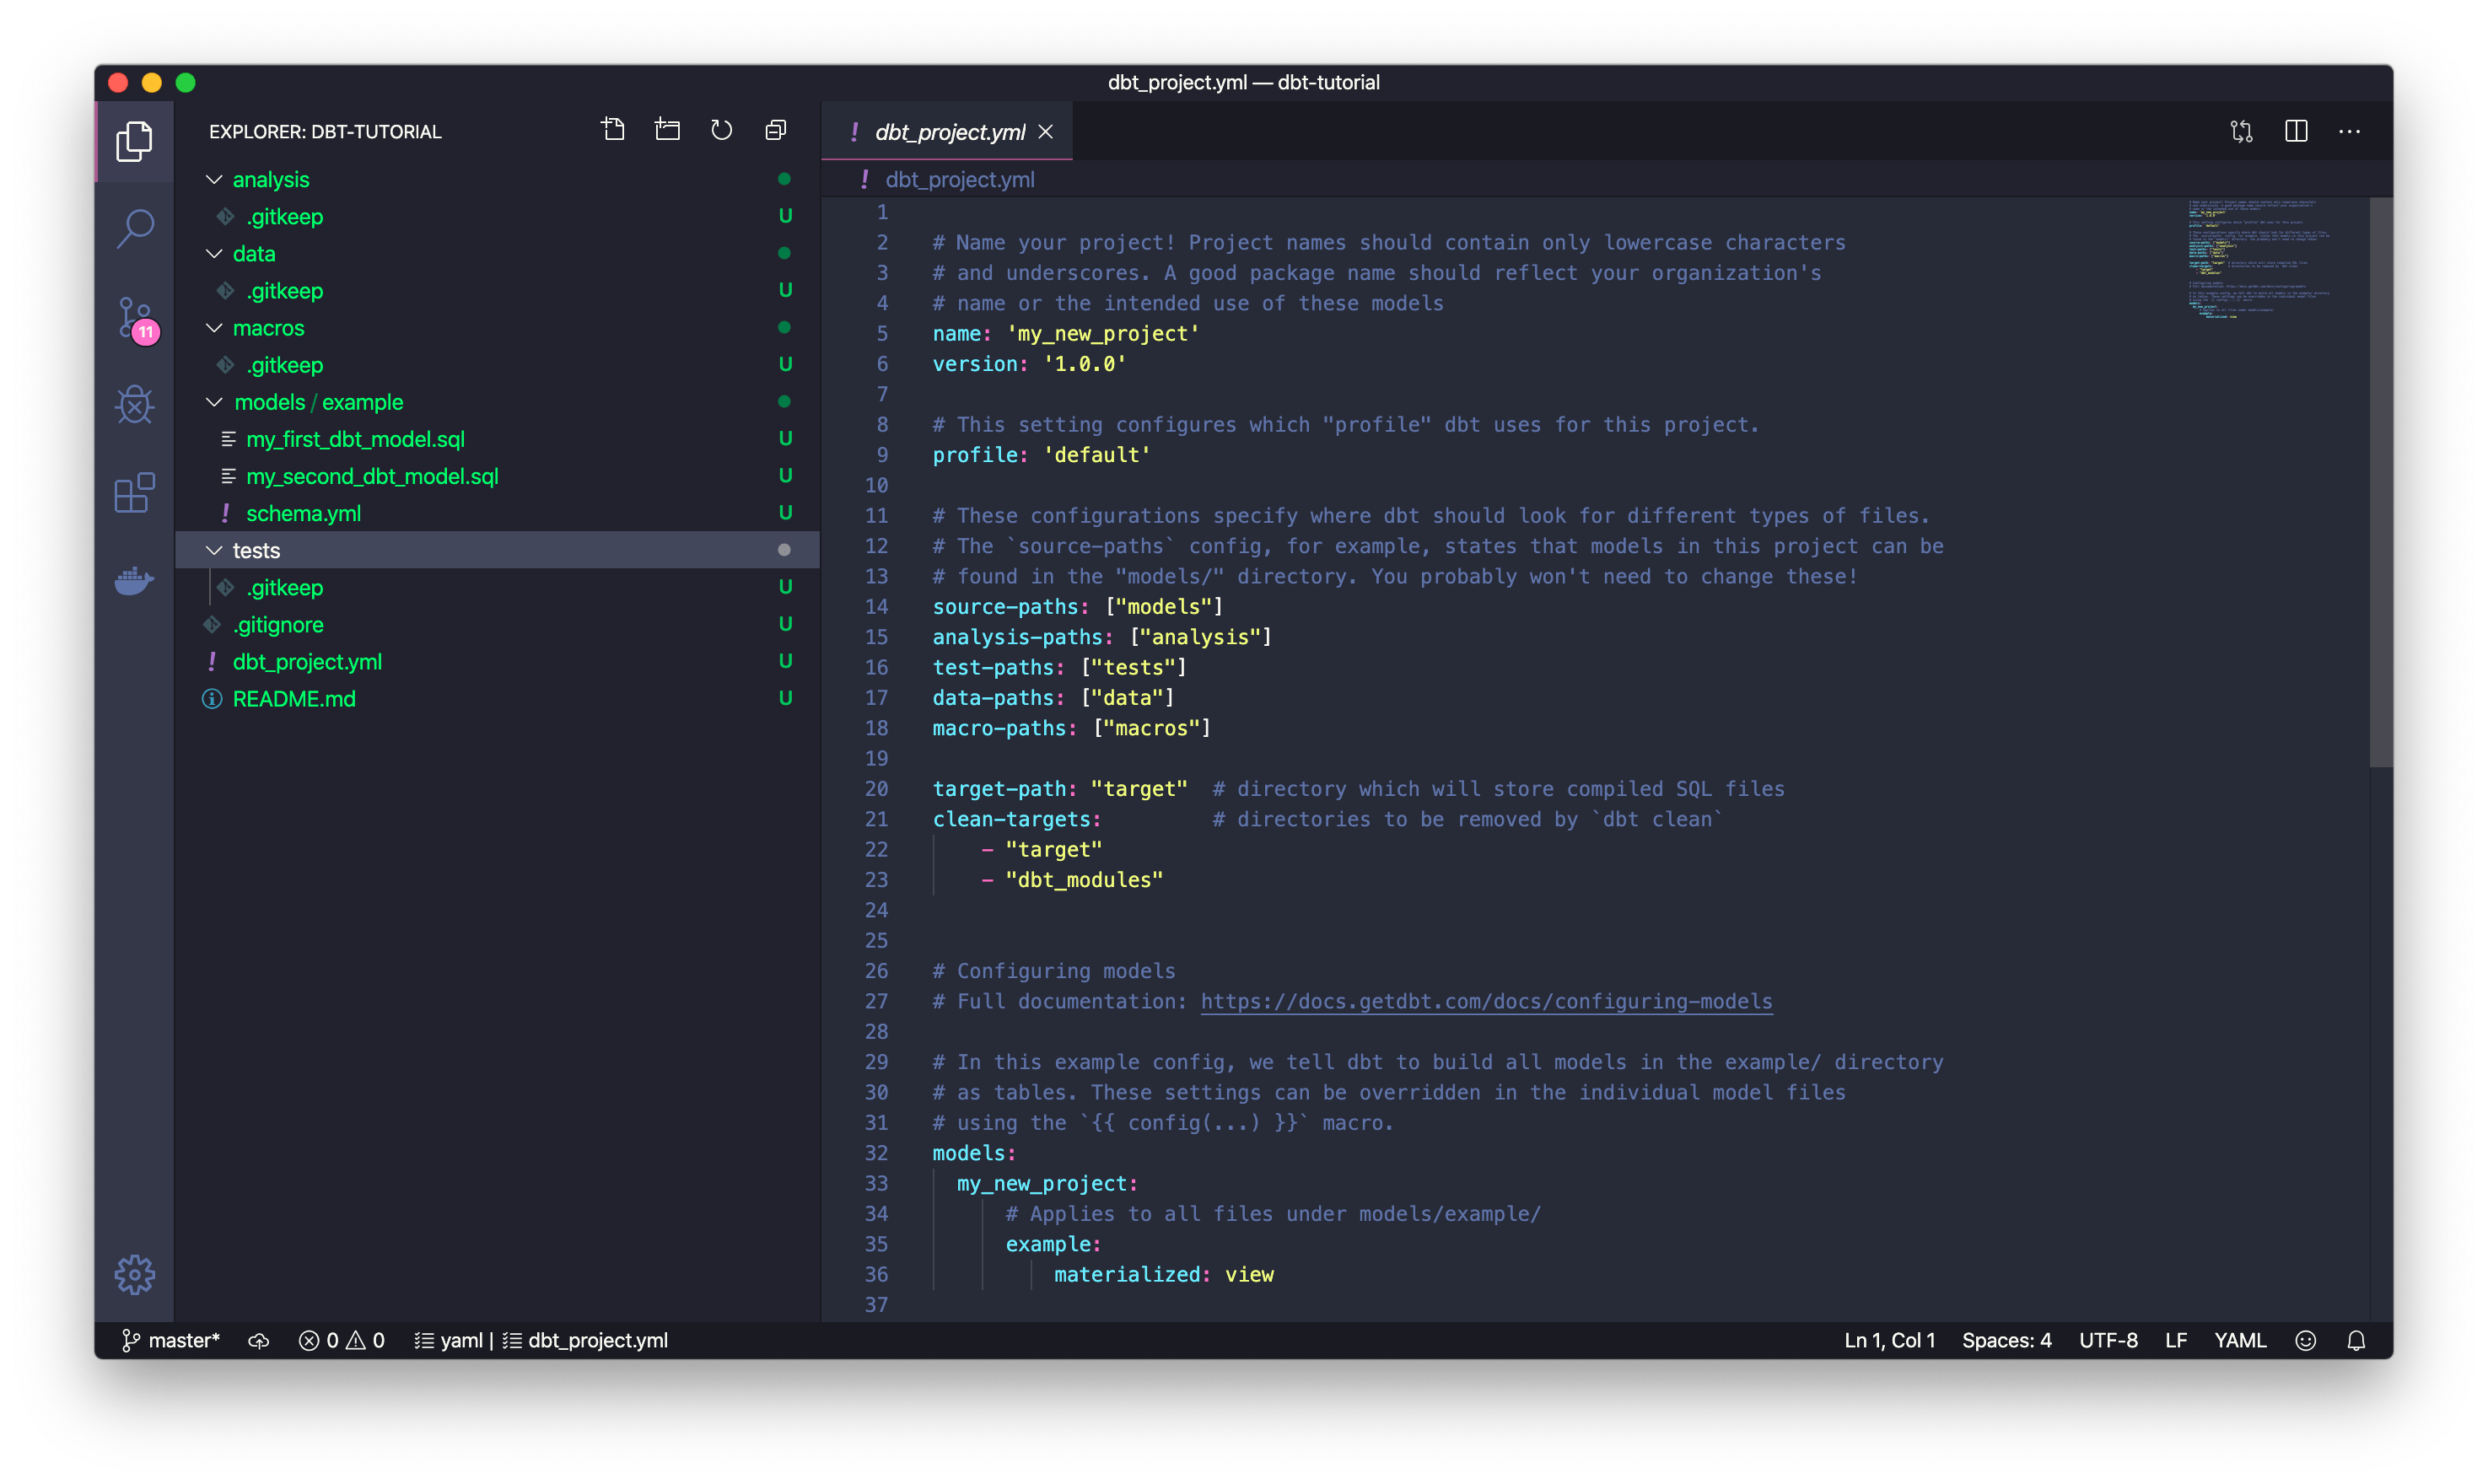
- Use a code editor like Atom or VSCode to open the project directory you created in the previous steps, which we named jaffle_shop. The content includes folders and
.sqland.ymlfiles generated by theinitcommand.
- dbt provides the following values in the
dbt_project.ymlfile:
name: jaffle_shop # Change from the default, `my_new_project`

...

profile: jaffle_shop # Change from the default profile name, `default`

...

models:
    jaffle_shop: # Change from `my_new_project` to match the previous value for `name:`
    ...
Connect to BigQuery
When developing locally, dbt connects to your data warehouse using a profile, which is a YAML file with all the connection details to your warehouse.
- Create a file in the
~/.dbt/directory namedprofiles.yml. - Move your BigQuery keyfile into this directory.
- Copy the following and paste into the new profiles.yml file. Make sure you update the values where noted.
jaffle_shop: # this needs to match the profile in your dbt_project.yml file
    target: dev
    outputs:
        dev:
            type: bigquery
            method: service-account
            keyfile: /Users/BBaggins/.dbt/dbt-tutorial-project-331118.json # replace this with the full path to your keyfile
            project: grand-highway-265418 # Replace this with your project id
            dataset: dbt_bbagins # Replace this with dbt_your_name, e.g. dbt_bilbo
            threads: 1
            timeout_seconds: 300
            location: US
            priority: interactive
- Run the
debugcommand from your project to confirm that you can successfully connect:
$ dbt debug
> Connection test: OK connection ok
FAQs
Perform your first dbt run
Our sample project has some example models in it. We're going to check that we can run them to confirm everything is in order.
- Enter the
runcommand to build example models:
dbt run
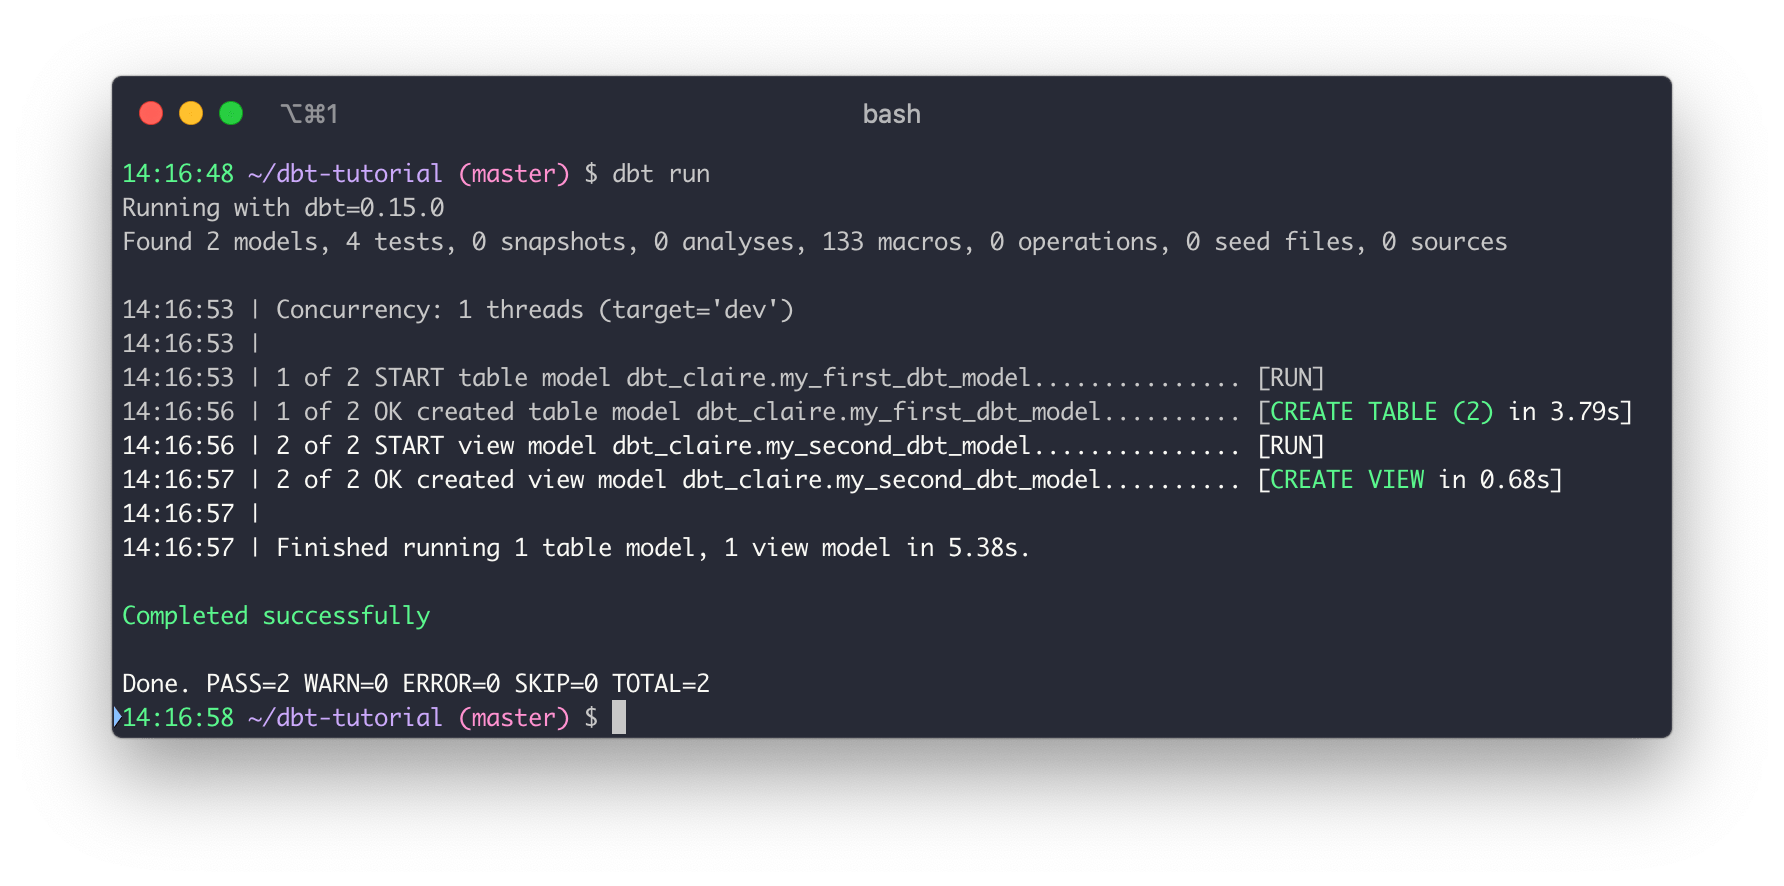
You should have an output that looks like this:
Commit your changes
Commit your changes so that the repository contains the latest code.
- Link the GitHub repository you created to your dbt project by running the following commands in Terminal. Make sure you use the correct git URL for your repository, which you should have saved from step 5 in Create a repository.
git init
git branch -M main
git add .
git commit -m "Create a dbt project"
git remote add origin https://github.com/USERNAME/dbt-tutorial.git
git push -u origin main
- Return to your GitHub repository to verify your new files have been added.
Build your first models
Now that you set up your sample project, you can get to the fun part — building models! In the next steps, you will take a sample query and turn it into a model in your dbt project.
Checkout a new git branch
Check out a new git branch to work on new code:
- Create a new branch by using the
checkoutcommand and passing the-bflag:
$ git checkout -b add-customers-model
>  Switched to a new branch `add-customer-model`
Build your first model
- Open your project in your favorite code editor.
- Create a new SQL file in the
modelsdirectory, namedmodels/customers.sql. - Paste the following query into the
models/customers.sqlfile.
- BigQuery
- Databricks
- Redshift
- Snowflake
with customers as (

    select
        id as customer_id,
        first_name,
        last_name

    from `dbt-tutorial`.jaffle_shop.customers

),

orders as (

    select
        id as order_id,
        user_id as customer_id,
        order_date,
        status

    from `dbt-tutorial`.jaffle_shop.orders

),

customer_orders as (

    select
        customer_id,

        min(order_date) as first_order_date,
        max(order_date) as most_recent_order_date,
        count(order_id) as number_of_orders

    from orders

    group by 1

),

final as (

    select
        customers.customer_id,
        customers.first_name,
        customers.last_name,
        customer_orders.first_order_date,
        customer_orders.most_recent_order_date,
        coalesce(customer_orders.number_of_orders, 0) as number_of_orders

    from customers

    left join customer_orders using (customer_id)

)

select * from final
with customers as (

    select
        id as customer_id,
        first_name,
        last_name

    from jaffle_shop_customers

),

orders as (

    select
        id as order_id,
        user_id as customer_id,
        order_date,
        status

    from jaffle_shop_orders

),

customer_orders as (

    select
        customer_id,

        min(order_date) as first_order_date,
        max(order_date) as most_recent_order_date,
        count(order_id) as number_of_orders

    from orders

    group by 1

),

final as (

    select
        customers.customer_id,
        customers.first_name,
        customers.last_name,
        customer_orders.first_order_date,
        customer_orders.most_recent_order_date,
        coalesce(customer_orders.number_of_orders, 0) as number_of_orders

    from customers

    left join customer_orders using (customer_id)

)

select * from final
with customers as (

    select
        id as customer_id,
        first_name,
        last_name

    from jaffle_shop.customers

),

orders as (

    select
        id as order_id,
        user_id as customer_id,
        order_date,
        status

    from jaffle_shop.orders

),

customer_orders as (

    select
        customer_id,

        min(order_date) as first_order_date,
        max(order_date) as most_recent_order_date,
        count(order_id) as number_of_orders

    from orders

    group by 1

),

final as (

    select
        customers.customer_id,
        customers.first_name,
        customers.last_name,
        customer_orders.first_order_date,
        customer_orders.most_recent_order_date,
        coalesce(customer_orders.number_of_orders, 0) as number_of_orders

    from customers

    left join customer_orders using (customer_id)

)

select * from final
with customers as (

    select
        id as customer_id,
        first_name,
        last_name

    from raw.jaffle_shop.customers

),

orders as (

    select
        id as order_id,
        user_id as customer_id,
        order_date,
        status

    from raw.jaffle_shop.orders

),

customer_orders as (

    select
        customer_id,

        min(order_date) as first_order_date,
        max(order_date) as most_recent_order_date,
        count(order_id) as number_of_orders

    from orders

    group by 1

),

final as (

    select
        customers.customer_id,
        customers.first_name,
        customers.last_name,
        customer_orders.first_order_date,
        customer_orders.most_recent_order_date,
        coalesce(customer_orders.number_of_orders, 0) as number_of_orders

    from customers

    left join customer_orders using (customer_id)

)

select * from final
- From the command line, enter
dbt run.
When you return to the BigQuery console, you can select from this model.
FAQs
Change the way your model is materialized
One of the most powerful features of dbt is that you can change the way a model is materialized in your warehouse, simply by changing a configuration value. You can change things between tables and views by changing a keyword rather than writing the data definition language (DDL) to do this behind the scenes.
By default, everything gets created as a view. You can override that at the directory level so everything in that directory will materialize to a different materialization.
-
Edit your
dbt_project.ymlfile.-
Update your project
nameto:dbt_project.ymlname: 'jaffle_shop' -
Configure
jaffle_shopso everything in it will be materialized as a table; and configureexampleso everything in it will be materialized as a view. Update yourmodelsconfig block to:dbt_project.ymlmodels:
jaffle_shop:
+materialized: table
example:
+materialized: view -
Click Save.
-
-
Enter the
dbt runcommand. Yourcustomersmodel should now be built as a table!infoTo do this, dbt had to first run a
drop viewstatement (or API call on BigQuery), then acreate table asstatement. -
Edit
models/customers.sqlto override thedbt_project.ymlfor thecustomersmodel only by adding the following snippet to the top, and click Save:models/customers.sql{{
config(
materialized='view'
)
}}
with customers as (
select
id as customer_id
...
) -
Enter the
dbt runcommand. Your model,customers, should now build as a view.- BigQuery users need to run
dbt run --full-refreshinstead ofdbt runto full apply materialization changes.
- BigQuery users need to run
-
Enter the
dbt run --full-refreshcommand for this to take effect in your warehouse.
FAQs
Delete the example models
You can now delete the files that dbt created when you initialized the project:
-
Delete the
models/example/directory. -
Delete the
example:key from yourdbt_project.ymlfile, and any configurations that are listed under it.dbt_project.yml# before
models:
  jaffle_shop:
    +materialized: table
    example:
+materialized: viewdbt_project.yml# after
models:
jaffle_shop:
+materialized: table -
Save your changes.
FAQs
Build models on top of other models
As a best practice in SQL, you should separate logic that cleans up your data from logic that transforms your data. You have already started doing this in the existing query by using common table expressions (CTEs).
Now you can experiment by separating the logic out into separate models and using the ref function to build models on top of other models:
- Create a new SQL file,
models/stg_customers.sql, with the SQL from thecustomersCTE in our original query. - Create a second new SQL file,
models/stg_orders.sql, with the SQL from theordersCTE in our original query.
- BigQuery
- Databricks
- Redshift
- Snowflake
select
    id as customer_id,
    first_name,
    last_name

from `dbt-tutorial`.jaffle_shop.customers
select
    id as order_id,
    user_id as customer_id,
    order_date,
    status

from `dbt-tutorial`.jaffle_shop.orders
select
    id as customer_id,
    first_name,
    last_name

from jaffle_shop_customers
select
    id as order_id,
    user_id as customer_id,
    order_date,
    status

from jaffle_shop_orders
select
    id as customer_id,
    first_name,
    last_name

from jaffle_shop.customers
select
    id as order_id,
    user_id as customer_id,
    order_date,
    status

from jaffle_shop.orders
select
    id as customer_id,
    first_name,
    last_name

from raw.jaffle_shop.customers
select
    id as order_id,
    user_id as customer_id,
    order_date,
    status

from raw.jaffle_shop.orders
- Edit the SQL in your
models/customers.sqlfile as follows:
with customers as (

    select * from {{ ref('stg_customers') }}

),

orders as (

    select * from {{ ref('stg_orders') }}

),

customer_orders as (

    select
        customer_id,

        min(order_date) as first_order_date,
        max(order_date) as most_recent_order_date,
        count(order_id) as number_of_orders

    from orders

    group by 1

),

final as (

    select
        customers.customer_id,
        customers.first_name,
        customers.last_name,
        customer_orders.first_order_date,
        customer_orders.most_recent_order_date,
        coalesce(customer_orders.number_of_orders, 0) as number_of_orders

    from customers

    left join customer_orders using (customer_id)

)

select * from final
- Execute
dbt run.
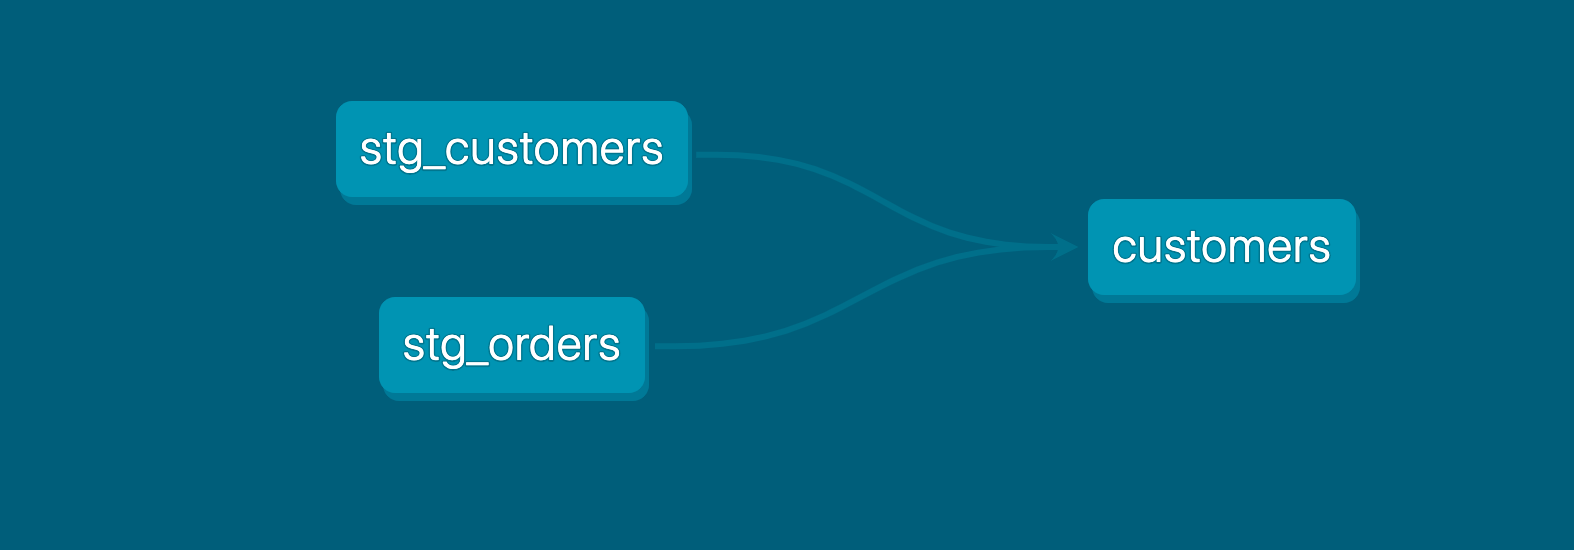
This time, when you performed a dbt run, separate views/tables were created for stg_customers, stg_orders and customers. dbt inferred the order to run these models. Because customers depends on stg_customers and stg_orders, dbt builds customers last. You do not need to explicitly define these dependencies.
FAQs
Next steps
Before moving on from building your first models, make a change and see how it affects your results:
- Write some bad SQL to cause an error — can you debug the error?
- Run only a single model at a time. For more information, see Syntax overview.
- Group your models with a
stg_prefix into astagingsubdirectory. For example,models/staging/stg_customers.sql.- Configure your
stagingmodels to be views. - Run only the
stagingmodels.
- Configure your
You can also explore:
- The
targetdirectory to see all of the compiled SQL. Therundirectory shows the create or replace table statements that are running, which are the select statements wrapped in the correct DDL. - The
logsfile to see how dbt Core logs all of the action happening within your project. It shows the select statements that are running and the python logging happening when dbt runs.
Add tests to your models
Adding tests to a project helps validate that your models are working correctly.
To add tests to your project:
-
Create a new YAML file in the
modelsdirectory, namedmodels/schema.yml -
Add the following contents to the file:
models/schema.ymlversion: 2
models:
- name: customers
columns:
- name: customer_id
tests:
- unique
- not_null
- name: stg_customers
columns:
- name: customer_id
tests:
- unique
- not_null
- name: stg_orders
columns:
- name: order_id
tests:
- unique
- not_null
- name: status
tests:
- accepted_values:
values: ['placed', 'shipped', 'completed', 'return_pending', 'returned']
- name: customer_id
tests:
- not_null
- relationships:
to: ref('stg_customers')
field: customer_id -
Run
dbt test, and confirm that all your tests passed.
When you run dbt test, dbt iterates through your YAML files, and constructs a query for each test. Each query will return the number of records that fail the test. If this number is 0, then the test is successful.
FAQs
Document your models
Adding documentation to your project allows you to describe your models in rich detail, and share that information with your team. Here, we're going to add some basic documentation to our project.
-
Update your
models/schema.ymlfile to include some descriptions, such as those below.models/schema.ymlversion: 2
models:
- name: customers
description: One record per customer
columns:
- name: customer_id
description: Primary key
tests:
- unique
- not_null
- name: first_order_date
description: NULL when a customer has not yet placed an order.
- name: stg_customers
description: This model cleans up customer data
columns:
- name: customer_id
description: Primary key
tests:
- unique
- not_null
- name: stg_orders
description: This model cleans up order data
columns:
- name: order_id
description: Primary key
tests:
- unique
- not_null
- name: status
tests:
- accepted_values:
values: ['placed', 'shipped', 'completed', 'return_pending', 'returned']
- name: customer_id
tests:
- not_null
- relationships:
to: ref('stg_customers')
field: customer_id -
Run
dbt docs generateto generate the documentation for your project. dbt introspects your project and your warehouse to generate a JSON file with rich documentation about your project.
- Run
dbt docs servecommand to launch the documentation in a local website.
FAQs
Next steps
Before moving on from testing, make a change and see how it affects your results:
- Write a test that fails, for example, omit one of the order statuses in the
accepted_valueslist. What does a failing test look like? Can you debug the failure? - Run the tests for one model only. If you grouped your
stg_models into a directory, try running the tests for all the models in that directory. - Use a docs block to add a Markdown description to a model.
Commit updated changes
You need to commit the changes you made to the project so that the repository has your latest code.
- Add all your changes to git:
git add -A - Commit your changes:
git commit -m "Add customers model, tests, docs" - Push your changes to your repository:
git push - Navigate to your repository, and open a pull request to merge the code into your master branch.
Schedule a job
We recommend using dbt Cloud as the easiest and most reliable way to deploy jobs and automate your dbt project in production.
For more info on how to get started, refer to create and schedule jobs.
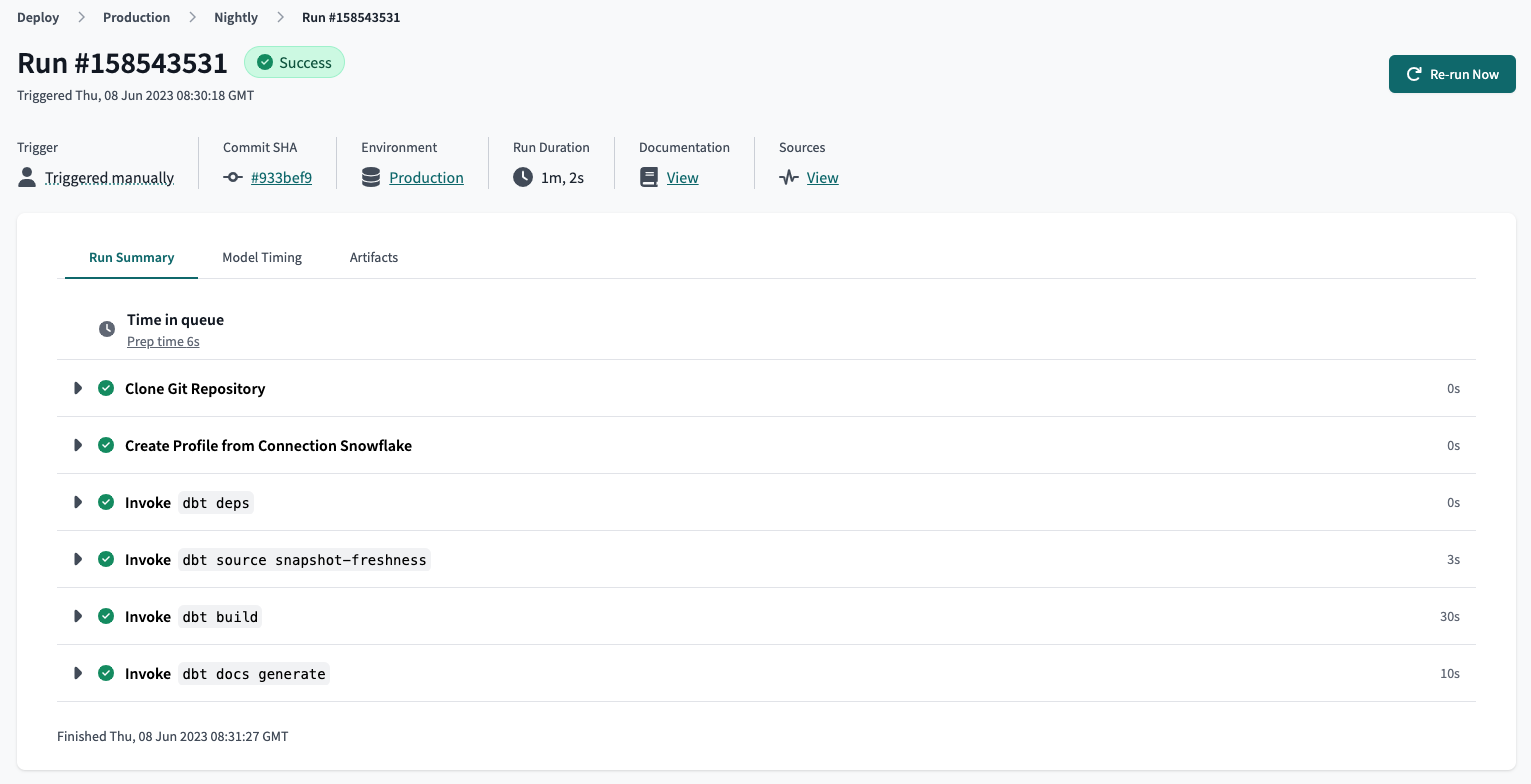
 Overview of a dbt Cloud job run, which includes the job run details, trigger type, commit SHA, environment name, detailed run steps, logs, and more.
For more information about using dbt Core to schedule a job, refer dbt airflow blog post.


